If you're wondering how to remove a stuck oil plug, the answer usually comes down to the right tool, the right angle, and a bit of patience. A seized drain plug is one of the most common headaches during a DIY oil change, but it doesn't have to turn into a trip to the mechanic. Whether the last person over-torqued it or corrosion has bonded the threads, you have several options to break it free without damaging your oil pan. This guide walks you through proven methods, from simple tricks to more advanced techniques, so you can get back to your regular car care routine without the frustration.
An over-tightened oil plug is surprisingly common. Quick-lube shops sometimes use impact tools that exceed the manufacturer's torque spec. Home mechanics occasionally give it "one more turn for safety." And over time, heat cycles and dissimilar metals create a near-permanent bond between the plug and the pan. The good news? Almost every stuck plug can be removed without replacing the oil pan — if you approach it correctly.
Before you grab the biggest breaker bar in your garage, take a moment to understand why brute force alone can make things worse. A stripped head or cracked pan thread is far more expensive to fix than a stubborn plug. Let's work through this systematically.
Contents
Why Oil Drain Plugs Get Stuck
Understanding what caused the problem helps you pick the right solution. A plug that's simply over-torqued requires a different approach than one that's corroded in place. Knowing how to remove a stuck oil plug starts with identifying which type of seizure you're dealing with.
Over-Torquing During Previous Service
Most oil drain plugs call for somewhere between 25 and 35 foot-pounds of torque — roughly the force of tightening with a short ratchet using just your wrist. When someone uses a long breaker bar or an impact wrench to install the plug, they can easily double or triple that spec. The threads compress and deform slightly, creating a mechanical lock that resists normal removal force.
You'll recognize over-torque as the primary culprit when the plug head still looks clean and undamaged, but the bolt simply won't budge. The threads aren't corroded — they're just compressed beyond their design intent. This is actually the easier scenario to fix because the metal is still intact.
Corrosion and Galvanic Reaction
When two different metals sit in contact with moisture and heat cycling, galvanic corrosion creates a bond at the molecular level. Steel plugs in aluminum oil pans are the classic example. The corrosion products fill the thread gaps and effectively weld the two pieces together.
Signs of corrosion seizure include white or green residue around the plug base, a plug that feels "crunchy" when you first get it to move, or a vehicle that's gone years between oil changes. This type requires penetrating oil and patience more than raw force.
If you see white powdery residue around an aluminum oil pan plug, that's galvanic corrosion — soak with penetrating oil for at least 30 minutes before applying any torque.
Fast Methods to Free a Stuck Oil Plug
These techniques work for the majority of stuck plugs you'll encounter. Start here before moving to more aggressive methods. Most DIY mechanics can handle these with basic tools they already own.
Apply Heat to the Oil Pan
Metal expands when heated. By warming the oil pan area around the plug (not the plug itself), you create a slight gap between the pan threads and the plug threads. A heat gun works well for this. Hold it six to eight inches from the pan surface and warm the area evenly for two to three minutes.
Don't use a torch — you're working near oil residue, and concentrated flame can warp a thin aluminum pan. A heat gun at 500-600°F provides enough thermal expansion without the fire risk. Once the area is warm to the touch (not burning hot), immediately attempt removal while the expansion is at its peak.
The Shock and Impact Technique
Sometimes a stuck plug needs a sharp shock rather than sustained pressure. Place your socket wrench on the plug and give the end of the wrench handle a firm tap with a hammer. The sudden impact force can break the corrosion bond or thread compression without the sustained twisting force that strips bolt heads.
You can also use a manual impact driver (the kind you hit with a hammer). These tools convert the downward hammer blow into rotational force. They're inexpensive — usually under $20 — and invaluable for stuck fasteners throughout your vehicle. If you're already comfortable putting your car on jack stands for oil changes, adding an impact driver to your toolkit is a smart investment.
Never use a power impact wrench to remove a drain plug — the uncontrolled torque can crack an aluminum pan or shear the plug head clean off.
Advanced Removal for Severely Seized Plugs
If the quick methods didn't work, the plug is likely corroded into the threads or the head is starting to round off from previous attempts. These techniques require more specialized tools but can save you from an oil pan replacement.
Using a Six-Point Socket and Breaker Bar
If you've been using a twelve-point socket, switch to a six-point socket immediately. Twelve-point sockets contact the bolt head at thinner points, which concentrates force and rounds corners. A six-point socket grips the flat surfaces fully and distributes force evenly.
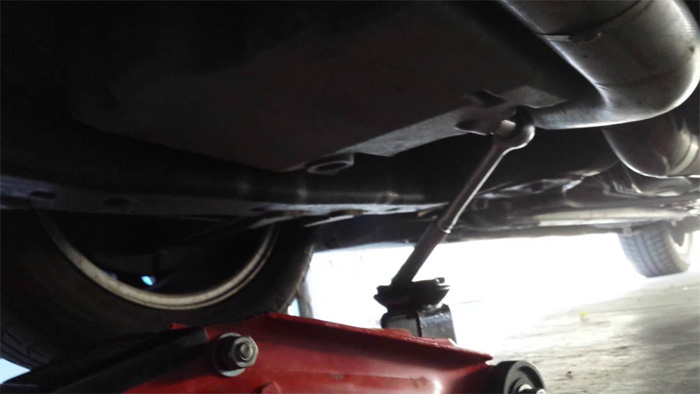
Pair the six-point socket with a breaker bar — not a ratchet. A breaker bar's solid construction handles higher torque without the risk of ratchet mechanism failure. Position yourself so you're pulling the bar toward you (not pushing away), which gives you better control if the plug suddenly breaks free. You want a slow, steady increase in force rather than a sudden jerk.
| Method | Best For | Risk Level | Tools Needed |
|---|---|---|---|
| Penetrating oil + hand socket | Light corrosion | Low | PB Blaster, 6-pt socket, ratchet |
| Heat gun + breaker bar | Over-torqued plugs | Low | Heat gun, 6-pt socket, breaker bar |
| Impact driver (manual) | Moderate corrosion | Medium | Impact driver, hammer, correct bit |
| Bolt extractor socket | Rounded plug heads | Medium | Extractor socket set, breaker bar |
| Weld nut to plug | Completely rounded/stripped | High | Welder, nut, socket |
| Drill and extract | Sheared plug (last resort) | High | Drill, EZ-Out set, tap set |
Rounded Bolt Extractors
If previous removal attempts have rounded the plug head, standard sockets won't grip anymore. Bolt extractor sockets (sometimes called "turbo sockets") have a spiral internal pattern that bites into damaged bolt heads as you turn counterclockwise. Brands like Irwin Bolt-Grip and Gearwrench make sets specifically sized for common drain plugs.
Tap the extractor socket firmly onto the rounded plug with a hammer so the teeth bite in, then use your breaker bar normally. These extractors are designed to grip tighter the more force you apply. Just keep in mind they're a one-way tool — once they bite in, the plug usually can't be reused (which is fine since you should replace a damaged plug anyway).

For plugs that are completely rounded with no edges left to grip, some mechanics weld a nut directly onto the plug face. This gives you a fresh set of flats to grab with a socket. However, welding near an oil pan requires thorough cleaning and carries fire risk — this is typically a professional-level repair. If you're weighing your options for draining oil without removing the plug at all, you might find our comparison of oil extractor versus drain plug methods helpful as a temporary workaround.
Preventing Stuck Plugs Long-Term
Getting a stuck plug out is only half the battle. If you don't change your installation habits, you'll fight the same problem at your next oil change. These preventive steps take less than a minute but save hours of frustration down the road.
Proper Torque Specifications
Look up the exact torque spec for your vehicle's drain plug — it's in the owner's manual or a quick search away. Most common specs fall between 25 and 35 ft-lbs for steel pans, and 20 to 25 ft-lbs for aluminum pans. Use a torque wrench every single time. "Hand tight plus a quarter turn" is a recipe for the exact problem you just spent an hour solving.
A basic click-type torque wrench costs $25-40 and lasts for years. It's one of those tools that pays for itself the first time it prevents a stuck plug or a cracked pan. When you're already investing in proper tools like the right oil filter wrench size, adding a torque wrench to the routine makes sense.
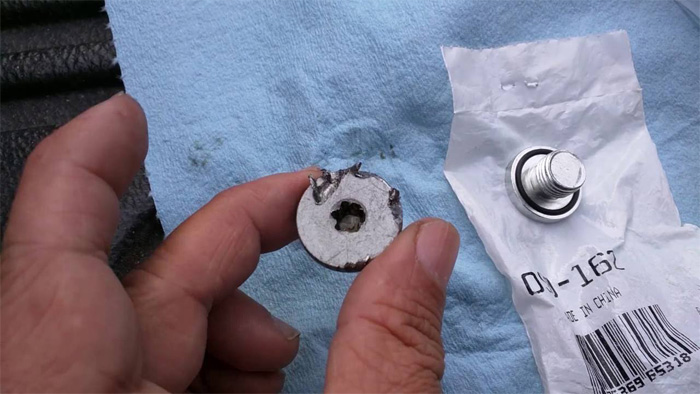
Crush Washer Replacement
That small copper or aluminum washer on your drain plug isn't decorative. It's a crush washer — designed to deform once and create a seal. Reusing a crush washer means you need more torque to achieve the same seal, which leads to over-tightening. Fresh washers seal properly at the correct torque spec.
Crush washers cost pennies and come in bulk packs. Buy a pack of 25 for your specific plug size and replace the washer at every oil change. Some vehicles use rubber O-ring style plugs instead — these are even more forgiving and rarely seize, but they still need periodic replacement when the rubber hardens.
- Apply a thin film of fresh oil to the plug threads before reinstalling — this prevents corrosion without affecting torque readings like anti-seize compounds can
- Clean both the plug threads and the pan threads with a rag before reinstalling to remove any debris or old sealant
- Thread the plug in by hand for the first several turns to ensure it's not cross-threading — if it feels rough, back out and try again
A new crush washer at every oil change is the cheapest insurance against a stuck plug — skip it once and you might pay for it with a stripped pan.
When DIY Isn't Enough
There's a point where continued DIY attempts risk turning a $5 plug into a $500 oil pan replacement. Knowing when to stop is just as important as knowing how to remove a stuck oil plug in the first place.
Dealing with Stripped Threads
If the plug comes out but the threads in the pan are damaged, you have two repair options. A thread repair kit (like a Helicoil or TimeSert) installs a new threaded insert into the pan. This is a permanent fix that's actually stronger than the original threads. Most kits cost $20-40 and come with the drill bit, tap, and inserts you need.
The other option is an oversized drain plug. These have larger threads that cut into fresh metal past the damaged area. They're a quicker fix but give you only one shot — if the oversize plug ever strips, the pan needs replacement. For most home mechanics, a thread repair insert is the better long-term solution if you're comfortable with the process. Understanding the difference between oil filters and fuel filters is basic maintenance knowledge, but thread repair takes you into intermediate territory.
Alternative Drain Methods
If your plug is truly seized and you need an oil change now, you have alternatives. Oil extractors pump oil out through the dipstick tube, bypassing the drain plug entirely. They don't get quite 100% of the old oil, but they remove enough for a serviceable oil change while you plan your plug repair.
Some mechanics install a fumoto valve — a small ball valve that replaces the drain plug permanently. Once installed (at the correct torque, with the correct washer), you never touch the threads again. You just flip the valve open for future oil changes. It's worth considering if you've had repeated plug issues or if your pan threads are marginal after a repair. Knowing how often to change your oil filter is part of the same regular maintenance mindset that prevents these problems from recurring.
Frequently Asked Questions
Can I use anti-seize compound on my oil drain plug?
You can, but use it sparingly and reduce your torque by about 20%. Anti-seize acts as a lubricant that changes the friction coefficient of the threads, meaning the same torque value produces more clamping force. A thin film of fresh motor oil on the threads provides adequate corrosion protection without altering the torque relationship.
What should I do if the drain plug head shears completely off?
If the head breaks off leaving the threaded body in the pan, you'll need to drill into the center of the remaining plug and use a screw extractor (EZ-Out). This requires careful centering to avoid damaging the pan threads. If you're not confident with a drill in tight spaces, this is a good time to visit a mechanic — the repair is straightforward for a professional with the right tools and access angle.
Is it safe to drive with a stuck drain plug if I can't get it out today?
Yes, a stuck drain plug is only a problem when you need to change oil. The plug is still sealed and holding oil in. You can drive normally until you're ready to tackle the removal. Just don't let your oil change interval stretch too far while you're putting it off — old oil still degrades your engine regardless of plug condition.
The right torque, a fresh crush washer, and clean threads — that's all it takes to make sure you never fight a stuck oil plug again.


About Chris Lewis
Chris Lewis developed a deep knowledge of automotive filtration, maintenance, and repair through years of hands-on experience working on vehicles — a passion rooted in time spent in his father's San Francisco auto shop from an early age. He has practical familiarity with air, oil, fuel, and cabin filter systems across a wide range of vehicle makes and models, along with experience evaluating the tools and equipment that serious DIY mechanics rely on. At MicrogreenFilter, he covers automotive and motorcycle filter reviews, maintenance guides, and automotive tool recommendations.
Get FREE Filters now. Or latest free tools from our best collections.
Disable Ad block to get all the secrets. Once done, hit any button below