Learning how to install a jeep antenna takes about 15 minutes and requires no special tools beyond what you already have in your garage. Whether your factory antenna snapped off on a trail, got damaged in a car wash, or you simply want a shorter stubby style, the swap is one of the easiest automotive upgrades you can tackle. The process is nearly identical across Wrangler JK, JL, TJ, and Gladiator models — unscrew the old one, prep the mount, and thread on the new one. Below, you'll find every detail you need to get it done right the first time.
Most Jeep owners overthink this job. The antenna base on modern Wranglers and Gladiators uses a standard threaded stud — no wiring harness to disconnect, no dashboard disassembly, and no dealership visit required. If you can twist a light bulb, you can handle this. The real decisions come before you pick up a wrench: choosing the right antenna type for your driving habits and understanding how each style affects reception.
This guide walks you through every step from removal to final testing, covers the most common mistakes that lead to poor signal or a rattling mount, and helps you pick the antenna style that actually makes sense for your Jeep.
Contents
Step-by-Step: How to Install a Jeep Antenna
The actual installation is straightforward, but doing it in the right order prevents scratched paint and cross-threaded studs. Here's exactly how to install a Jeep antenna from start to finish.
Tools and Materials You Need
Gather everything before you start so you're not running back to the toolbox mid-job:
- Replacement antenna — matched to your Jeep's thread size (most JK/JL/JT models use a standard M6 x 1.0 thread)
- Microfiber cloth
- Painter's tape (optional, to protect surrounding paint)
- Anti-seize compound or dielectric grease
- Rubbing alcohol or contact cleaner
- Adjustable wrench or pliers (for stuck antennas only)
Most aftermarket Jeep antennas ship with the necessary adapter if the thread pitch differs from your factory base. Check the product listing before ordering to confirm compatibility with your model year.
Removing Your Old Antenna
Start by gripping the base of your existing antenna — not the middle or tip. Turn it counterclockwise. On most Jeeps from 2007 onward, the antenna simply unscrews by hand. If it's stuck from corrosion or over-tightening:
- Wrap the base with a microfiber cloth to protect the finish.
- Use adjustable pliers over the cloth and turn counterclockwise with steady pressure.
- Once it breaks free, unscrew the rest by hand.
- Clean the threaded stud with rubbing alcohol to remove grit, old grease, or corrosion.
- Inspect the stud threads — if they're visibly damaged or stripped, you'll need to replace the base mount (a separate job that involves accessing the mount from inside the fender).
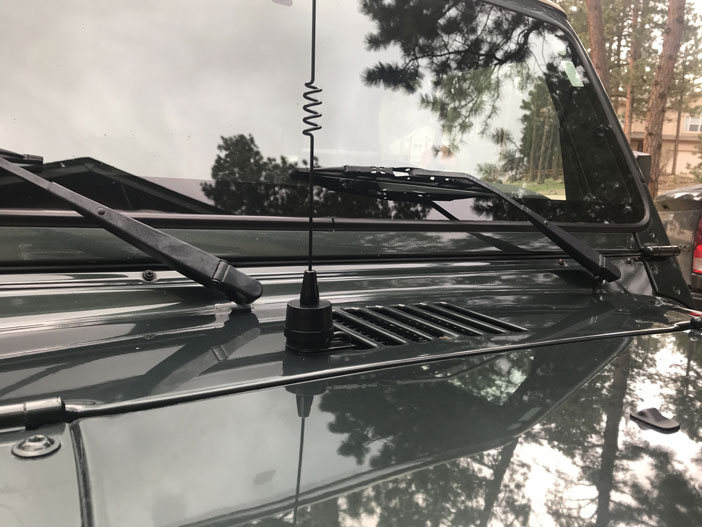
If your Jeep has an older cable-style antenna (common on pre-2007 TJ models), you'll need to disconnect the coaxial cable at the base before removal. This cable runs down through the fender and connects to the radio head unit. For cable-style setups, understanding your vehicle's electrical system and how to trace wiring makes the job much easier.
Installing the New Antenna
- Apply a thin coat of anti-seize compound to the threaded stud. This prevents future corrosion bonding and makes your next removal effortless.
- If your new antenna came with a thread adapter, screw that onto the stud first. Hand-tighten only.
- Thread the new antenna onto the stud (or adapter) clockwise by hand. Turn until snug — you should feel firm resistance.
- Give it an extra quarter-turn past finger-tight. That's it. No wrench needed.
- Test your radio immediately — tune to a weak AM and FM station to confirm signal quality.
The entire process from removal to testing takes under 10 minutes for screw-on models. Cable-connected antennas on older Jeeps add another 15–20 minutes for routing and connecting the coax.
Quick Wins to Improve Antenna Reception
Installing a new antenna doesn't guarantee perfect reception on its own. These quick adjustments make a noticeable difference in signal strength without any additional parts or expense.
Check Your Ground Connection
Your antenna mount needs a solid electrical ground to the chassis. On Jeeps, the antenna base bolts through the fender, and paint or rust between the mount and the body panel acts as an insulator. If your reception is weak after installing a new antenna:
- Remove the interior fender liner to access the back of the antenna mount.
- Check that the mounting nut is tight and making clean metal-to-metal contact.
- Sand off any paint or corrosion at the contact point if needed.
- Add a star washer between the mount and body panel to bite through any remaining coating.
A poor ground is the number one cause of weak reception after a new antenna install. For a deeper dive on signal optimization, check out our guide on how to improve AM radio reception — many of the same principles apply to FM and satellite radio.
Optimize Cable Routing
If you're working with a cable-connected antenna, how you route the coax matters. Keep the cable away from high-current wiring like the alternator feed and ignition harness. These create electromagnetic interference that shows up as static or buzzing on your radio. Use zip ties to secure the cable to existing wire looms and maintain at least 6 inches of separation from power wires.
Pro Tip: After installing your new antenna, tune to the weakest AM station you can find and listen while wiggling the antenna base. Any crackling or signal dropout means your ground connection or cable seat needs attention.
Antenna Installation Mistakes You Need to Avoid
This is a simple job, but these common errors lead to broken mounts, poor signal, and repeat work.
Overtightening the Base
The most frequent mistake is cranking down on the antenna with pliers or a wrench during installation. The threaded stud on your Jeep is typically a thin steel or brass rod. Overtightening can strip the threads, crack the antenna base, or warp the mounting plate underneath the fender. Hand-tight plus a quarter-turn is the correct torque. If you feel the need to use tools to tighten, something is wrong — either the threads are mismatched or cross-threaded.
Using the Wrong Thread Adapter
Jeep antenna threads aren't universal across all model years and trims:
- JK (2007–2018): Most use a 5/16"-24 thread.
- JL/JT (2018+): Standard M6 x 1.0 metric thread.
- TJ (1997–2006): Varies — some are cable-connected with a unique base.
Forcing an antenna with the wrong thread pitch onto your stud cross-threads the mount instantly. Always verify the thread specification before purchasing. If you're unsure, bring your old antenna to the auto parts store for a direct match.
Other common mistakes include:
- Forgetting to clean the stud threads before installing the new antenna — grit acts like sandpaper on every vibration.
- Skipping anti-seize — without it, the next removal in a few years could strip the stud.
- Not testing reception immediately — you want to catch problems before buttoning up interior panels.
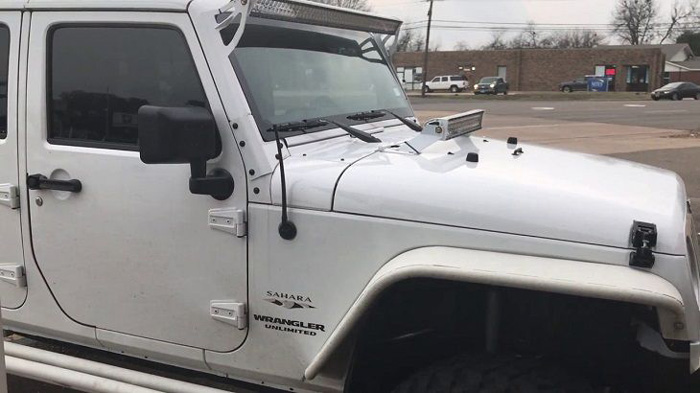
- Buying a stubby antenna without understanding the reception trade-off (more on this below).
Jeep Antenna Types Compared
Before you learn how to install a Jeep antenna, you need to pick the right one. The antenna market for Wranglers and Gladiators is packed with options, and each type has a distinct trade-off between reception quality, durability, and aesthetics.
| Antenna Type | Length | FM Reception | AM Reception | Durability | Best For |
|---|---|---|---|---|---|
| Factory Stock | 28–31" | Excellent | Excellent | Moderate | Daily drivers, highway commuters |
| Stubby (6–8") | 6–8" | Good | Poor | High | Off-roading, garage parking |
| Bullet/Shark Fin | 3–4" | Fair | Poor | Very High | Aesthetics, mild trails |
| Flexible Rubber | 13–15" | Very Good | Good | High | Trail use with decent reception |
| CB Combo | 24–48" | Good* | Fair* | Moderate | Off-road groups needing CB radio |
*CB combo antennas prioritize the CB frequency band. FM/AM performance depends on the specific dual-band design.
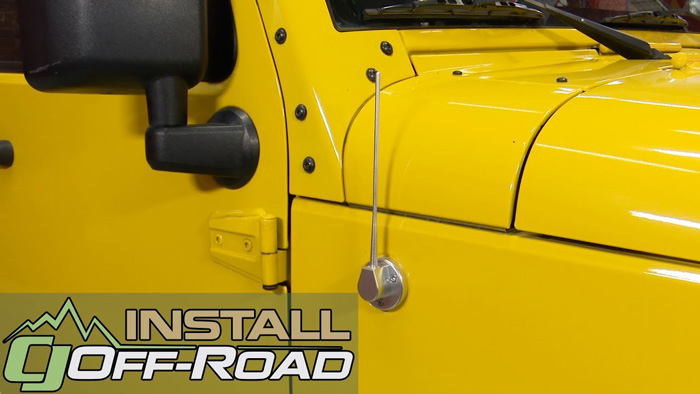
Stubby vs. Stock Length
Stubby antennas are the most popular upgrade because they look great and survive trails, car washes, and low-clearance garages. The trade-off is real, though. Antenna length directly correlates with reception quality — a shorter antenna captures less signal. According to the physics of radio antenna design, an ideal quarter-wave FM antenna is roughly 29 inches, which is why factory antennas are that length.
If you primarily stream music via Bluetooth or use satellite radio, a stubby antenna gives you cleaner aesthetics with minimal functional loss. If you rely on terrestrial radio for your commute, stick with a 13"+ option.
Bullet Style vs. Flexible Rubber
Bullet and shark fin antennas sit nearly flush to the fender. They're virtually indestructible but offer the weakest reception of any option. Flexible rubber antennas bend on trail obstacles instead of snapping, and their added length delivers meaningfully better signal than bullet styles. For Jeep owners who split time between pavement and trails, a 13" flexible rubber antenna is the best all-around compromise.
When to Replace vs. Repair Your Jeep Antenna
Not every antenna problem calls for a full replacement. Some issues have quicker, cheaper fixes.
Signs You Need a Full Replacement
Replace your Jeep antenna when you see any of these:
- Visible physical damage — snapped shaft, cracked base, bent stud
- Heavy corrosion on the threads or mounting surface that sanding can't resolve
- Persistent weak reception after confirming the ground, cable, and head unit are fine
- The antenna wobbles at the base even when fully tightened (worn threads)
- You're upgrading to a different style (stubby, flexible, CB combo)
Antenna replacement parts for Jeeps are inexpensive — most quality aftermarket options run between $15 and $45. Given the low cost, replacement is almost always more practical than attempting to repair a damaged antenna. This is similar to how replacing a worn car air filter costs so little that cleaning and reusing rarely makes sense.
When a Simple Fix Is Enough
Before ordering a replacement, rule out these common issues that mimic a bad antenna:
- Loose connection: The antenna may just need re-tightening at the base. Vibration from off-road driving loosens screw-on antennas over time.
- Dirty threads: Grit buildup between the antenna and stud creates a poor electrical connection. Remove, clean with contact cleaner, and reinstall.
- Radio head unit issue: If reception is poor across all stations, the problem might be your head unit, not the antenna. Test with a known-good antenna to isolate the issue. Understanding your vehicle's 12V electrical accessories can help you diagnose power-related reception problems.
- Cable damage (older models): On TJ and older Jeeps, check the coax cable for kinks, cuts, or corroded connectors before replacing the antenna itself.
Best Practices for Long-Lasting Antenna Performance
Once your new antenna is installed, a few maintenance habits will keep it performing well for years.
Routine Maintenance Tips
- Remove and clean the antenna threads every 6–12 months, especially if you drive in salted winter roads or coastal areas.
- Reapply anti-seize compound at each cleaning to prevent corrosion bonding.
- Check the mounting nut inside the fender annually — vibration loosens it over time.
- Wipe down the antenna shaft when you wash your Jeep. Road film and tree sap can degrade rubber antennas.
- If your Jeep sits outdoors, inspect the base seal for water intrusion — moisture in the fender cavity accelerates corrosion on the mounting hardware.
Treating your antenna with the same periodic attention you give other performance components prevents small problems from turning into a full replacement job.
Protecting Your Antenna Off-Road
Trail driving is the leading cause of Jeep antenna damage. Branches, roll-cage contacts, and trail debris all take their toll. Here's how to prevent damage:
- Remove the antenna entirely before heavy trails. Screw-on antennas come off in seconds. Toss it in the glove box.
- If you don't want to remove it, switch to a flexible rubber antenna that bends around obstacles instead of snapping.
- Consider a quick-disconnect mount for frequent trail users — these let you pop the antenna off without threading.
- Avoid running your Jeep through an automatic car wash with the antenna installed. The spinning brushes catch tall antennas and bend or snap them.
For Jeep owners who also maintain other exterior components, our guide on restoring a tonneau cover covers similar weather-protection principles that apply to any exterior accessory.
Frequently Asked Questions
Do I need any special tools to install a Jeep antenna?
No. Most modern Jeep antennas (JK, JL, JT) screw on by hand. The only time you need tools is when removing a corroded or overtightened old antenna — a pair of adjustable pliers wrapped in a cloth does the job. No drilling, wiring, or specialized equipment is required for standard screw-on replacements.
Will a stubby antenna affect my radio reception?
Yes. A shorter antenna receives less signal, particularly on AM frequencies. FM reception drops moderately with a 6–8" stubby, but it remains adequate in urban and suburban areas. If you rely on AM radio or live in a rural area with weaker transmitters, consider a 13" flexible antenna instead.
How do I know which thread size my Jeep antenna uses?
JL and JT models (2018+) typically use M6 x 1.0 metric threads. JK models (2007–2018) commonly use 5/16"-24 SAE threads. Check your owner's manual or measure your existing antenna stud with a thread gauge. Most aftermarket antennas include both adapters in the box.
Can I install a CB antenna on my Jeep's existing mount?
Not directly. CB antennas require their own coaxial cable connection to a CB radio unit. The factory antenna mount is connected to your AM/FM head unit only. CB combo antennas exist but require separate wiring. Most Jeep owners mount a dedicated CB antenna on the spare tire carrier or hood hinge.
How often should I replace my Jeep antenna?
There's no fixed schedule. Replace it when reception noticeably degrades, the antenna is physically damaged, or the threads are corroded beyond cleaning. With anti-seize and basic maintenance, a quality aftermarket antenna lasts 5–10 years or more.
Why does my new antenna rattle while driving?
Rattling means the antenna isn't seated firmly. Remove it, clean the threads on both the antenna and stud, check for debris or cross-threading, and reinstall. The antenna should feel snug at hand-tight plus a quarter-turn. If it still rattles, the mounting nut inside the fender may be loose.
Is it safe to drive through a car wash with a Jeep antenna installed?
Touchless car washes are fine. Avoid automatic washes with spinning brushes — they catch the antenna and can bend or snap it, especially factory-length and flexible rubber types. Remove the antenna beforehand or switch to a low-profile bullet/stubby style.
Do I need to disconnect the battery before installing a Jeep antenna?
No. The antenna receives passive radio signals — there's no power running to it that could cause a short or shock. You can safely install or remove the antenna with the ignition on, off, or anywhere in between. No battery disconnect is necessary.
Next Steps
- Verify your Jeep's antenna thread size — check your model year against the thread specifications above (M6 x 1.0 for JL/JT, 5/16"-24 for JK) and order the correct replacement antenna with the matching adapter.
- Gather your supplies before starting — pick up anti-seize compound and contact cleaner if you don't already have them. Both cost under $5 and make the difference between a one-time install and a corroded mess next time you need to remove the antenna.
- Install and immediately test your reception — after threading on the new antenna, tune through AM and FM bands to confirm signal quality. If reception is weak, revisit the ground connection at the fender mount before assuming the antenna is faulty.
- Set a 6-month reminder to inspect the antenna base — unscrew it, clean the threads, reapply anti-seize, and check the internal mounting nut. This 2-minute routine prevents corrosion from seizing the antenna to the stud.


About Chris Lewis
Chris Lewis developed a deep knowledge of automotive filtration, maintenance, and repair through years of hands-on experience working on vehicles — a passion rooted in time spent in his father's San Francisco auto shop from an early age. He has practical familiarity with air, oil, fuel, and cabin filter systems across a wide range of vehicle makes and models, along with experience evaluating the tools and equipment that serious DIY mechanics rely on. At MicrogreenFilter, he covers automotive and motorcycle filter reviews, maintenance guides, and automotive tool recommendations.
Get FREE Filters now. Or latest free tools from our best collections.
Disable Ad block to get all the secrets. Once done, hit any button below