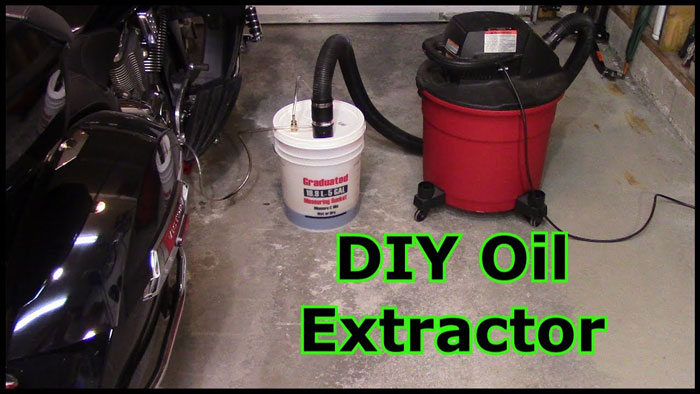
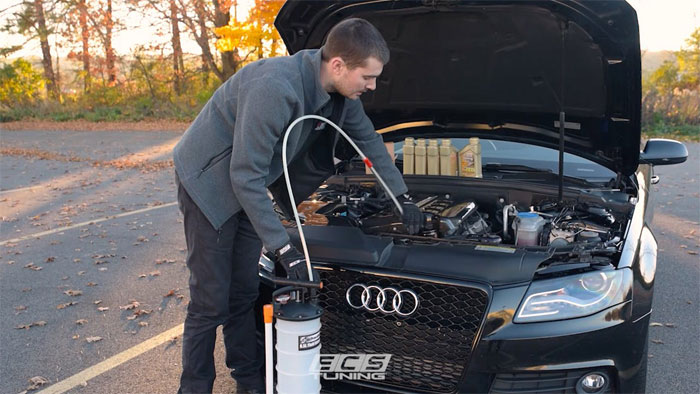
You suction oil from a car by inserting a tube down the dipstick hole and using a vacuum pump to extract the old oil directly into a collection container. Learning how to suction oil from car engines is one of the simplest car care skills you can pick up — no jack stands, no drain plug wrestling, and no messy spills on your garage floor. If you've been putting off oil changes because you dread crawling under the vehicle, extraction pumps change the game entirely.

Oil extraction through the dipstick tube has been standard practice in marine engines for decades. Now the same technology is available for everyday cars, trucks, and SUVs. Whether you drive a turbocharged sedan or a naturally aspirated pickup, the process works the same way — negative pressure pulls oil upward through a narrow tube while the engine is warm.
This guide covers everything from choosing the right extractor to avoiding common mistakes that leave dirty oil behind. You'll also learn when suction works better than draining — and when it doesn't. If you've ever struggled with a stuck drain plug, you'll appreciate having a backup method that bypasses it completely.
Contents
When Suction Oil Changes Make Sense
Not every oil change scenario calls for an extractor pump. But in several common situations, knowing how to suction oil from car engines saves you significant time, effort, and frustration. Here's when extraction truly shines over traditional draining.
Limited Access Situations
Some vehicles make drain plug access genuinely difficult. You'll benefit most from suction extraction when:
- Your vehicle has an undertray or splash shield that requires removal before reaching the drain plug
- You don't own a lift, ramps, or jack stands to safely raise the car
- The drain plug is recessed behind cross-members or exhaust components
- You're working in a tight parking garage or driveway with limited clearance
- Physical limitations make crawling underneath uncomfortable or unsafe
European vehicles like BMWs, Mercedes, and Audis are particularly well-suited for extraction. Many German manufacturers actually designed their dipstick tubes with extraction in mind — the tubes run straight to the bottom of the oil pan with minimal bends.
Fleet and Multi-Vehicle Maintenance
If you maintain multiple vehicles, extraction pumps cut your total service time dramatically. Consider the math:
- Traditional drain: 5 minutes raising + 15 minutes draining + 5 minutes lowering = 25 minutes per vehicle
- Suction extraction: 2 minutes setup + 8 minutes pumping + 2 minutes cleanup = 12 minutes per vehicle
- Over 4 vehicles, you save nearly an hour of labor
Marine mechanics have relied on extraction for boat engines since the 1970s because removing oil through the top is the only practical option when an engine sits in a cramped hull. That same convenience translates perfectly to modern cars with crowded engine bays.
Oil Suction Myths You Should Stop Believing
The internet is full of outdated advice about oil extraction. Let's dismantle the two biggest misconceptions that keep DIYers from trying this method.
Myth: Suction Never Gets All the Oil
This is the most persistent myth, and it's simply wrong for most vehicles. Multiple independent tests — including controlled experiments by engineering channels — show that extraction removes 95–100% of the oil when done correctly on a warm engine. In many cases, extraction actually outperforms draining because:
- Gravity draining leaves oil trapped in horizontal passages and baffles
- Suction pulls from the lowest point of the pan (where the dipstick tube terminates)
- Warm oil has lower viscosity, meaning suction captures it more completely
- Some pan designs have ridges near the drain plug that trap 100–200ml of old oil
The key variable is dipstick tube placement. If your tube reaches the pan floor, extraction is every bit as thorough as draining. If it terminates above the floor (rare in modern vehicles), you'll leave a small residual amount behind.
Myth: The Tube Damages Internal Components
Some people worry about the extraction tube scratching cylinder walls or dislodging sensors. This concern misunderstands the anatomy involved. The dipstick tube is a dedicated, sealed pathway that goes directly from the valve cover area to the oil pan. Your extraction hose follows this exact path — it doesn't contact pistons, bearings, or any moving parts.
The tube passes through open air inside the crankcase before reaching pooled oil at the bottom. You'd have to deliberately force the tube sideways with significant pressure to contact anything harmful — and even then, flexible silicone tubing can't scratch hardened steel.
Pro Tip: Mark your extraction tube with tape at the correct depth for your specific vehicle. This prevents over-insertion and lets you hit the pan floor consistently every time without guessing.
Extractor vs. Drain Plug: Head-to-Head
Choosing between suction and traditional draining depends on your vehicle, your setup, and what you prioritize. This section gives you a clear, data-driven comparison so you can decide which method fits your situation. For an even deeper analysis, check out our dedicated breakdown of oil extractor vs. drain plug methods.
Performance Comparison Table
| Factor | Suction Extraction | Drain Plug Method |
|---|---|---|
| Average time | 8–12 minutes | 15–25 minutes |
| Oil removal rate | 95–100% (warm engine) | 90–98% |
| Equipment cost | $30–$150 (pump) | $5–$20 (wrench + pan) |
| Vehicle lifting required | No | Yes (most vehicles) |
| Risk of cross-threading plug | None | Moderate |
| Mess potential | Low | Medium to High |
| Filter access | Separate step needed | Already underneath |
| Sediment removal | Good (reaches pan floor) | Good (gravity assists) |
| Works on all vehicles | Most (depends on tube path) | Yes (universal) |
Which Method Wins for Your Setup
Neither method is universally superior. Your choice comes down to a few practical factors:
Choose suction extraction when:
- You lack a lift or feel unsafe working under a car
- Your drain plug is difficult to access or has a history of stripping
- You want the fastest possible oil change
- You're changing oil on multiple vehicles in one session
- Your oil filter is accessible from the top (common on modern engines)
Stick with drain plug when:
- Your dipstick tube has bends that prevent tube insertion
- You need to inspect the drain plug washer or pan condition
- Your oil filter is only accessible from underneath anyway
- You want to flush engine sludge that has settled in the pan
Many experienced DIYers alternate between methods. They'll suction for routine changes and drain every third or fourth time to inspect the plug and pan for metal shavings or unusual deposits.
Maintaining Your Oil Extraction Equipment
Your extractor pump is an investment. Proper maintenance keeps it working efficiently for years. Neglect it, and you'll deal with weakened suction, contaminated seals, and eventual failure.
Post-Use Cleaning Protocol
Clean your extractor immediately after every use. Old oil left in the reservoir and tubing degrades rubber seals and makes your next extraction less effective. Follow this sequence:
- Empty all extracted oil into your waste container completely
- Pour 500ml of fresh, cheap oil through the system and pump it through
- Disconnect the extraction tube and wipe it down with a shop rag
- Pump air through the system for 30 seconds to clear residual liquid
- Leave the reservoir cap slightly open to prevent vacuum seal during storage
For manual pump extractors, also check the piston seal and lubricate it with a thin film of clean oil. This prevents the rubber from drying out between uses. If you notice your pump requiring more strokes to build vacuum, the seal is likely deteriorating — replace it before it fails mid-extraction.
Keeping your equipment clean parallels other maintenance habits. Just as you'd properly remove grease from machinery after a job, your extraction tools deserve the same attention.
Storage and Longevity Tips
- Store the extractor upright to prevent residual oil from pooling in the pump mechanism
- Keep extraction tubes coiled loosely — tight coils create permanent kinks that restrict flow
- Replace silicone tubes every 2–3 years regardless of appearance (they harden internally)
- Store in a temperature-stable environment; extreme cold makes seals brittle
- Never store with oil remaining in the reservoir — it attracts moisture and grows acidic over time
Electric extractors have additional considerations. Check battery terminals for corrosion, test the pump motor annually under load, and keep the power cord away from oil-contaminated surfaces that degrade insulation.
How to Suction Oil from Car Engines: Complete Walkthrough
Now that you understand the theory, let's walk through the actual process. This step-by-step guide works for both manual hand-pump extractors and electric vacuum units. The difference is only in how vacuum pressure is generated — the extraction technique is identical.
Preparation and Warm-Up
Proper preparation is the difference between extracting 95% of your oil and extracting 100%. Don't skip these steps:
- Warm the engine for 3–5 minutes. You want oil at operating temperature (around 180–210°F). Warm oil flows freely and separates from pan surfaces. Don't run it longer — you'll burn yourself on the extraction tube.
- Park on a level surface. Any tilt means oil pools to one side, and your tube might not reach the deepest point.
- Gather your supplies: extractor pump, correct diameter extraction tube, waste oil container, new oil, new filter, correct oil filter wrench, funnel, and shop rags.
- Remove the dipstick and measure the tube length needed. Insert the extraction tube until you feel it contact the pan floor, then mark that depth with tape.
- Check tube diameter. Most dipstick tubes accept 5–7mm OD tubing. Too thick and it won't fit; too thin and vacuum efficiency drops.
The Extraction Process
With preparation complete, you're ready to extract. Here's the process broken into clear steps:
- Insert the extraction tube down the dipstick hole to your marked depth
- Connect the tube to your extractor's intake port — ensure a tight seal
- Build vacuum pressure:
- Manual pump: 8–15 full strokes until you feel strong resistance
- Electric: Turn on and let the motor build pressure (usually 3–5 seconds)
- You'll see oil flowing through the clear tube almost immediately — dark and steady
- Maintain vacuum as needed (manual pumps lose pressure slowly — re-pump every 2–3 minutes)
- Watch the flow rate. When it slows to drops, gently rotate and reposition the tube to reach trapped pockets
- Continue until flow stops completely — this takes 5–10 minutes for 4–6 quarts
- Slowly withdraw the tube, keeping it over a rag to catch drips
During extraction, you can simultaneously address other maintenance items. Swap the oil filter while the pump works — most top-mount filters are accessible without any lifting. This multitasking is one of the biggest time advantages of the suction method.
Finishing Up and Disposal
Once extraction is complete, you need to button everything up properly:
- Replace the oil filter — hand-tighten plus a quarter turn. Over-tightening causes leaks and makes future removal difficult.
- Add fresh oil through the fill cap. Pour slowly and check the dipstick after adding about 80% of spec capacity.
- Top off carefully. Add remaining oil in small increments, checking the dipstick each time. Overfilling causes foaming and pressure issues.
- Run the engine for 60 seconds to circulate new oil through the filter and galleries.
- Shut off and wait 3 minutes for oil to settle back to the pan.
- Final dipstick check — level should read between the two marks, ideally near the upper one.
- Dispose of waste oil at any auto parts store or municipal recycling center. Never dump oil down drains or into the ground.
Record your mileage and date. If you track maintenance digitally or in your owner's manual, note that you used the extraction method. This helps you remember to do a drain-method change periodically for a full pan inspection.
Frequently Asked Questions
Can you suction oil from any car?
Most modern cars with straight dipstick tubes work perfectly for suction extraction. Vehicles with curved or extremely narrow dipstick tubes — common in some older Japanese models — may not allow the extraction hose to reach the pan floor. Check by inserting the tube before purchasing a pump.
How long does it take to suction oil from a car?
The actual extraction takes 5–12 minutes depending on oil capacity and temperature. A warm 4-cylinder engine with 4 quarts typically completes in 6–8 minutes. Larger engines with 7+ quarts take closer to 12 minutes. The entire oil change process — including filter swap and refill — averages 20 minutes total.
Is suction oil change as good as draining?
Yes — controlled tests consistently show extraction removes the same amount of oil as draining, and sometimes more. The critical factor is warming the engine first and ensuring your tube reaches the pan floor. Both methods leave negligible residual oil when done properly.
Do you still need to change the oil filter when using suction?
Absolutely. The oil filter traps contaminants regardless of how you remove the oil. Always replace the filter during every oil change. Many modern vehicles have top-mounted cartridge filters that you can swap without lifting the car — a perfect complement to the suction method.
What size tubing fits a dipstick hole?
Most passenger vehicles accept tubing between 5mm and 7mm outer diameter. Check your specific dipstick tube inner diameter before buying. Some extractors include multiple tube sizes. When in doubt, start with 6mm — it fits the majority of applications and provides good vacuum efficiency.
Can suction extraction damage my engine?
No. The extraction tube follows the same path as your dipstick — a dedicated passage that leads directly to the oil pan. It doesn't contact moving parts, sensors, or bearing surfaces. Use flexible silicone tubing and insert gently. There are zero documented cases of engine damage from proper oil extraction.
How do I know when all the oil is out?
Flow through the clear extraction tube slows to occasional drops, then stops entirely. At that point, gently rotate and reposition the tube to check for remaining pockets. Compare the extracted volume against your engine's listed oil capacity — you should see 90–100% of the spec amount in your waste container.
Should I alternate between suction and drain methods?
It's good practice to drain conventionally every 3rd or 4th oil change. This lets you inspect the drain plug washer, check for metal particles, and examine pan condition. For routine changes in between, suction is faster and equally effective at removing old oil from the system.
Key Takeaways
- Oil suction extraction through the dipstick tube removes 95–100% of old oil when done on a warm engine — matching or exceeding traditional drain plug methods.
- The method eliminates the need for vehicle lifting, reduces mess, and cuts total oil change time nearly in half compared to conventional draining.
- Proper preparation (warm engine, level surface, correct tube depth) is the single biggest factor determining extraction completeness.
- Alternate between suction and drain methods every few changes to maintain visibility on drain plug condition and pan health.


About Chris Lewis
Chris Lewis developed a deep knowledge of automotive filtration, maintenance, and repair through years of hands-on experience working on vehicles — a passion rooted in time spent in his father's San Francisco auto shop from an early age. He has practical familiarity with air, oil, fuel, and cabin filter systems across a wide range of vehicle makes and models, along with experience evaluating the tools and equipment that serious DIY mechanics rely on. At MicrogreenFilter, he covers automotive and motorcycle filter reviews, maintenance guides, and automotive tool recommendations.
Get FREE Filters now. Or latest free tools from our best collections.
Disable Ad block to get all the secrets. Once done, hit any button below