Ever popped a brand-new fuse into your car only to watch it blow again within seconds? That's a textbook sign of a short circuit — and knowing how to find a short in a car is the difference between a quick, cheap fix and an expensive guessing game at the shop. The short answer: you'll trace the fault systematically using a multimeter, a test light, and a wiring diagram. This guide walks you through exactly how to do it. For more hands-on repair guides, check out our DIY maintenance section.
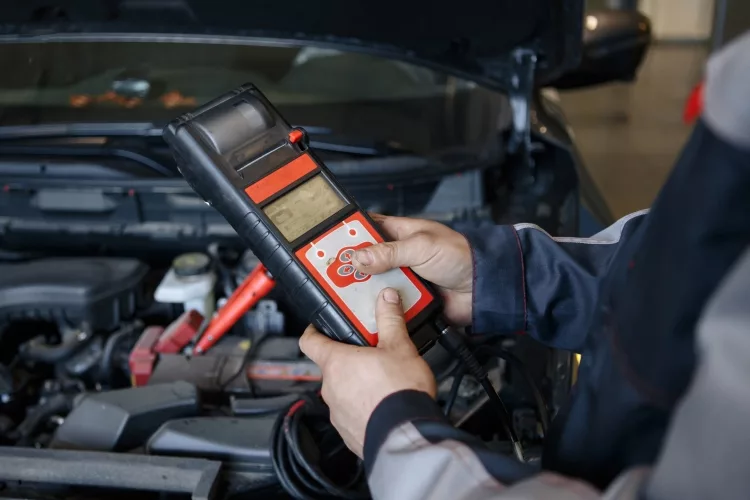
A short circuit happens when electrical current takes an unintended path — usually a damaged wire contacting bare metal or another wire. The result is excess current flow, which blows fuses, drains your battery overnight, or in serious cases, starts a fire. It sounds dramatic, but the root cause is usually something mundane: a chafed wire rubbing behind a door panel, a harness pinched under a seat, or a cheaply wired accessory someone installed last year.
The process of finding a short is less about technical wizardry and more about methodical elimination. You isolate circuits, measure resistance, and follow the wiring until you find the exact culprit. Let's get into it.
Contents
- When a Short Circuit Shows Up: Warning Signs You Shouldn't Ignore
- The Right Tools for Tracking Down a Short
- How to Find a Short in a Car, Step by Step
- DIY vs. Letting a Professional Handle It
- Budget Breakdown: What This Repair Can Cost
- Keeping Electrical Shorts from Coming Back
- Frequently Asked Questions
- Key Takeaways
When a Short Circuit Shows Up: Warning Signs You Shouldn't Ignore
Shorts don't always announce themselves with sparks and smoke. More often, the clues are subtle — and easy to misattribute to a bad battery or a failing alternator. Here are the scenarios you're most likely to encounter in the real world.
Recurring Blown Fuses
This is the number one telltale sign. If a fuse keeps blowing in the same slot, something downstream is pulling more current than that circuit can handle. Swapping fuses without finding the cause is just delaying the inevitable — and potentially masking a dangerous fault.
- Fuse blows immediately after replacement → likely a hard short (direct wire-to-ground contact)
- Fuse blows after minutes or hours → could be a heat-related or intermittent short
- Multiple fuses blowing in different slots → suspect a shared ground or corroded fuse block
- Fuse blows only when a specific door opens → door jamb wiring is the first place to look
Unexplained Battery Drain
If your battery is dead every morning but tests healthy when fully charged, a parasitic draw is eating it while the car sits. This is often a short that keeps a circuit energized when it should be completely off. Related wiring faults — like those covered in our guide to tail light wiring repair costs — can cause exactly this kind of invisible overnight drain.
Flickering Lights or Erratic Electronics
- Dashboard lights dim or flicker randomly while driving
- Power windows respond sluggishly or stop mid-travel
- Radio resets or goes silent on bumpy roads
- Check engine light appears with no obvious mechanical cause
- Accessories turn on by themselves with the ignition off
Any one of these is worth investigating. Multiple symptoms appearing together almost always point to an electrical fault that will get worse — not better — on its own.
The Right Tools for Tracking Down a Short
You don't need a fully equipped shop to diagnose a short circuit. But having the right gear on hand makes the difference between finding the fault in 20 minutes versus spending an entire weekend chasing your tail.
Essential Tools
- Digital multimeter — measures voltage, resistance (ohms), and continuity; this is your primary diagnostic weapon
- 12V test light — a simple probe that lights up when it detects live current; great for fast circuit checks without reading a display
- Fuse puller and fuse chart — know what each fuse controls before you start pulling them randomly
- Wiring diagram for your specific vehicle — factory service manual, AllData, or Mitchell1 subscription; don't skip this step
- Automotive circuit tracer — sends a tonal signal through a wire so you can trace it with a receiver pen, even through insulation and interior trim
Nice-to-Have Additions
- Alligator clip leads — for hands-free multimeter probing inside tight spaces
- Heat gun and heat shrink tubing — for proper insulation repair after you locate the fault
- Plastic trim removal tools — pull door panels and dash trim without scratches or broken clips
- Headlamp — electrical gremlins almost always hide in the darkest, most awkward corners of the vehicle
Pro tip: Before buying a circuit tracer, check AutoZone or O'Reilly's free tool loan program — most locations carry them. Borrowing one can cut your diagnosis time in half on hidden shorts inside door jambs or under the dash.
How to Find a Short in a Car, Step by Step
Here's the methodical process professionals use — adapted for a DIYer with basic tools. Work slowly, document what you test, and don't skip steps. Jumping ahead usually means backtracking.
Step 1: Identify and Isolate the Affected Circuit
- Open both fuse boxes — most modern cars have one under the hood and one under the dash. Locate your fuse diagram (usually printed on the fuse box lid or in the owner's manual).
- Find the fuse that keeps blowing or the circuit associated with your symptoms.
- Pull that fuse. Set your multimeter to DC voltage, or use your test light. With the ignition in the "on" position, probe both sides of the empty fuse slot. One side should have voltage (the supply side), one should not.
- If both sides show voltage, current is feeding back through the circuit — that's your confirmation of a short. If only the supply side reads voltage, proceed to resistance testing.
Step 2: Measure Resistance to Ground
- Turn the ignition fully off. Disconnect the negative battery terminal so no current flows during testing.
- Set your multimeter to ohms (Ω) or the continuity/beep setting.
- Probe the load side of the fuse socket with one lead, and touch the other lead to a known good chassis ground — bare metal, not a painted surface.
- Reading near 0 ohms confirms a short to ground. A reading of several thousand ohms or "OL" (open loop) means no short on that circuit — check a different one.
Step 3: Trace the Wiring to the Fault
Once you've confirmed the short circuit, follow the wire toward the component it powers:
- Start at the fuse box and work downstream toward the load.
- Unplug connectors one at a time and re-test resistance after each disconnect. When the multimeter reading jumps to "OL," the short is between the last unplugged connector and the previous test point.
- Physically inspect that wire section: look for chafing against metal brackets, pinch points at body seams, melted insulation near exhaust components, and rodent damage.
If your brake lights or tail lights are acting up alongside the short, our breakdown of why brake lights work but tail lights don't covers the specific circuit behavior that often accompanies intermittent shorts in that area.
Step 4: Repair or Replace the Damaged Section
- Chafed or nicked wire: strip the insulation back past the damaged area, splice in a fresh section of wire with crimp connectors, and seal with heat shrink tubing — electrical tape alone isn't a permanent fix
- Melted wire section: replace the entire run if more than a few inches are compromised; partial repairs on melted insulation tend to fail again
- Faulty component (relay, motor, module): replace the component itself, not just the wiring leading to it
- After the repair, reinstall the correct-amperage fuse and test the circuit before buttoning everything back up
DIY vs. Letting a Professional Handle It
Not every short is a weekend DIY project. Here's how to honestly gauge whether you should stay in your driveway or make an appointment.
Good Candidates for DIY
- A fuse keeps blowing after a recent accessory installation — the cause is probably right there
- The short is in an isolated, easy-to-access circuit like interior lights or a power window
- You have a wiring diagram and you're comfortable following it
- The vehicle is older with simpler, non-multiplexed wiring architecture
When to Call a Pro
- CAN bus or multiplex wiring — modern vehicles route multiple signals through the same physical wire; diagnosing these without a factory scan tool is extremely difficult
- Any short inside an airbag (SRS) circuit — always defer airbag system work to a certified technician, no exceptions
- You've traced every accessible section of the circuit and still can't locate the fault
- You smell burning insulation, see visible arcing, or notice smoke — stop driving immediately
An honest self-assessment here saves you both time and money. A shop with a proper signal tracer can often find in an hour what you'd spend an entire weekend chasing.
Budget Breakdown: What This Repair Can Cost
The cost to find and fix a short in a car varies significantly depending on the circuit involved, your vehicle's complexity, and whether you DIY or use a shop.
| Scenario | DIY Cost | Shop Cost | Notes |
|---|---|---|---|
| Basic tools (multimeter, test light) | $25–$60 | N/A | One-time investment, reusable for years |
| Circuit tracer rental | $0 (free loan program) | N/A | Available at most AutoZone/O'Reilly locations |
| Wire splice repair (heat shrink + connectors) | $5–$20 | $75–$150 | Labor cost dominates the shop price |
| Partial wiring harness replacement | $30–$150 (parts only) | $200–$600+ | Highly dependent on harness location |
| Component replacement (relay, switch, motor) | $15–$100 | $100–$350 | Shops typically charge 1–2 hours diagnostic labor |
| Dealership electrical diagnosis | N/A | $100–$175/hr | May be credited toward repair if done at the same dealer |
If you're paying a shop, ask upfront whether diagnostic time is billed separately from repair time. Some shops fold it into the final estimate; others charge it regardless of outcome. According to automotive electrical system principles, proper diagnosis is the majority of the skilled work — the physical repair is straightforward once the fault location is confirmed.
Keeping Electrical Shorts from Coming Back
Finding a short once is satisfying. Finding the same short again three months later is not. A few simple habits keep your wiring healthy long-term.
Protect Wiring During Any Modifications
- Always use properly rated, fused connectors when adding aftermarket accessories — never splice directly into an existing circuit without a fuse inline
- Route new wiring away from heat sources, sharp metal edges, and components that move
- Secure wire runs with zip ties every 12–18 inches — unsecured wiring gradually chafes itself against the chassis over thousands of miles
- Never tap into an existing circuit with a load that exceeds what it was designed to handle; check the factory wire gauge and fuse rating first
Regular Inspection Habits
- Check door jamb wiring annually — this is one of the highest-flex areas on any vehicle and where insulation fails most often
- Inspect wiring under the hood for heat damage near the exhaust manifold and turbo components
- Look for rodent damage if the car sits in a garage for extended periods — mice and squirrels are drawn to wire insulation materials
- After any flood exposure, have the full wiring harness inspected by a professional before returning to normal driving
The same principle that applies to quality filtration — spending a little more upfront to avoid a bigger problem later — holds true for automotive wiring. Cheap aftermarket components with thin, poorly insulated leads are one of the most common causes of new shorts in otherwise healthy vehicles.
Frequently Asked Questions
Can a short circuit drain a car battery overnight?
Yes — a short that keeps a circuit energized when the ignition is off creates a parasitic draw that slowly depletes the battery. Even a small constant drain of 100–200 milliamps can kill a fully charged battery within 24–48 hours. To measure it, set your multimeter to milliamps and put it in series with the battery's negative terminal, then pull fuses one at a time until the reading drops to a normal range (typically under 50 milliamps).
Is it safe to keep driving with a short circuit in the car?
It depends entirely on which circuit is affected. A short in a low-current interior lighting circuit is inconvenient but not immediately dangerous. A short in a high-current circuit near fuel lines, the starter, or the ignition system is a genuine fire risk. If you smell burning plastic or insulation — or see any smoke — pull over safely and don't drive the vehicle until the fault is diagnosed and repaired.
How long does it take to find and fix a short in a car?
A simple short with an obvious cause — like a recently installed accessory wired incorrectly — can be diagnosed and repaired in under an hour. An intermittent short buried inside a door harness or routed through the firewall can take several hours even for an experienced technician. The diagnostic process is almost always more time-consuming than the physical repair itself, which is why shops charge hourly for electrical diagnosis.
Key Takeaways
- Knowing how to find a short in a car comes down to methodical circuit isolation — confirm the fault with a multimeter, then unplug connectors one at a time until resistance readings change and the fault location narrows.
- A digital multimeter and a wiring diagram are the two essential tools; everything else speeds up the process but isn't strictly required for a basic diagnosis.
- DIY diagnosis works well for simple, accessible circuits — defer to a professional for airbag systems, CAN bus wiring, or any intermittent short you can't physically locate after a thorough trace.
- Prevention is straightforward: secure all wiring runs, inspect flex points annually, and never install aftermarket accessories without an inline fuse rated for the actual load.


About Chris Lewis
Chris Lewis developed a deep knowledge of automotive filtration, maintenance, and repair through years of hands-on experience working on vehicles — a passion rooted in time spent in his father's San Francisco auto shop from an early age. He has practical familiarity with air, oil, fuel, and cabin filter systems across a wide range of vehicle makes and models, along with experience evaluating the tools and equipment that serious DIY mechanics rely on. At MicrogreenFilter, he covers automotive and motorcycle filter reviews, maintenance guides, and automotive tool recommendations.
Get FREE Filters now. Or latest free tools from our best collections.
Disable Ad block to get all the secrets. Once done, hit any button below